Tuesday 12 January 2016


Despite having the unfair reputation as just being a place to take drugs and see prostitutes, Amsterdam has a diverse range of attractions and activities to entertain, inform, and inspire. Here's my list on what you must see and what you could probably miss in the city of windmills, tulips, and canals:


1) The Electric Ladyland Museum - Tweede Leliedwarsstraat 5


I'm not going to go too in depth into this museum, and encourage you not to read about it too much, because it doesn't sound like you'd be missing much by not going. But one thing's for sure: you must visit. What initially seems like a relatively 'nothing special' bunch of glow-in-the-dark rocks [if some online descriptions are anything to go by], is turned into an absolute pleasure by the passion, knowledge, and skill of the museum owner / guide, who is clearly well-versed in the ways of the paintbrush, the UV light, and the blacklight.


2) The Amsterdam Museum Kalverstraat 92
With free entry to anyone with an iAmsterdam tourist card, and with a variety of permanent and temporary exhibitions, the Amsterdam Museum is an irresistable proposition, and I would recommend placing it towards the start of your trip. The museum not only recounts The Netherlands' history as a naval powerhouse, the status of religion and tolerance in the country, and more 'populist' historial events, but also has an intriguing exhibition on graffiti [which conveys the links between graffiti from Amsterdam and New York, and sparks an interesting debate on what point something stops being 'graffiti' and starts being 'street art'.


3) Noomi Van Gelder's BoutiquePrinsengracht 16
Thinking of buying some souvenirs for a loved one? Don't buy anything orange - it's not really present until Koningsdag [King's Day] or an international football match. Avoid items that say Amsterdam on them, too, unless you want everyone to be silently judging you. Instead, I recommend buying a trinket or two from this lovely little boutique on Prinsengracht. The pieces are all made by the person who owns / runs the shop, each one unique in their own way. Luckily, the prices don't break the bank, and the owner is a delight to speak to while browsing.

4) Stedelijk Museum - Museumplein 10
I hate modern art, but love modern design. Thankfully, this museum serves as Amsterdam's home to both of these, and charts the rise of the modernist movement, and also shows that some pieces of modern design aren't as modern as you think!


5) A Boat Tour [most depart from just outside Centraal Station]

Okay, if I'm honest, you'll probably be able to see most of the city's sights by walking. One of my
biggest gripes with myself on my trip was that I'd end up taking a tram from Centraal Station, but would always somehow end up walking back to Centraal Station again in the course of my travels. However, the city's canals are a great way to see Amsterdam from another view point, and the tour guides always provide some helpful background information on the area and its architecture. You get one free tour with the iAmsterdam card, so why not? 


6) The Amsterdam Tulip Museum - Prinsengracht 116
In the grand scheme of things, it doesn't exactly 'feel like' a museum, given its slightly small proportions. However, 

7) Los Pilones - Kerkstraat 63
Forget the watered-down, United States-influenced 'Mexican' food you see at food chains near you. Los Pilones, a local business that is now flourishing across the city, serves authentic Mexican cuisine in a bustling atmosphere right near the centre of town. Yes, that's right. I told you to go to The Netherlands to get Mexican food.

8) Museum Vrolik - Amstel III en Bullewijk, Amsterdam Zuid-Oost
This isn't exactly in a central location, but absolutely perfect if you want to get out of the hustle and bustle for a short period, or great if you're staying in the south east! The Vroliks' Museum is dedicated to biology, and, more accurately, anatomical anomalies. The museum isn't for the faint of heart, and even those with a strong constitution will be amazed and touched by some of the artefacts on display. But it is definitely worth a visit to remind you about the fragility and variability that exists in the human body!


What to Avoid

1) The Amsterdam Cheese Museum
It's not a museum. Just a cheese shop with an entire basement for PR and Marketing. Cheesy in more than one sense. Don't even bother going here just because the queue for the Anne Frank Huis is too long and you think this will keep you entertained.

2) The Heineken Brewery Experience
Again, it's more advertorial than eye opening, and don't be conned in to going because of the free bottle of beer. While I did not get to see Brouwerij 't Ij [they only run tours on a Friday], I hear it's a much better experience from a much better brewery!

3) Vondelpark and the Begijinhof gardens (unless it's summer)
Honestly, they're just parks or gardens. That's it. If you've got a park near you, it's pretty much the same thing. Though I am assured that they do become more of a spectacle in the summer months.

Monday 7 December 2015

I used to be a BlackBerry fan, but I'm ashamed to say that I jumped ship on them just before the rest of the world did. Despite using three of their devices in a row, Google's Android held a lot of my OS envy, and in 2011, I purchased the absolutely awesome Xiaomi Mi 2. Despite holding up incredibly well to three years of stress, daily use and damn near torture from me, it's beginning to slow down somewhat. In the spirit of keeping up with the latest tech trends, and under the influence of nostalgia, its replacement will be the BlackBerry Priv!

The BlackBerry Priv is refreshing for two reasons - firstly, it is a candybar phone with a slide-out keyboard [perfect for an oaf like me, who hasn't yet fully managed to become an expert user of touch-screen keyboards], and secondly, it's BlackBerry's first phone to run Android. Blackberry's clear wish with this device is to offer the versatility, functionality, and popularity of Android, combined with the legendary level of security that the Candian phonemakers were infamous [or famous?] for in the past.

First Impressions


The device is very well packaged, as pretty much all phones are these days. It was a surprise to me that the box didn't say BlackBerry in bigger writing towards the top of it, and chose to stick with just the device model and its tagline.
Upon opening the box, I was struck by the size of the phone. Coming from what felt like a 4.3 inch-displayed minnow, the 5.4 inch Priv looked gargantuan, and it's clear that, while this screen will be an utter joy to view things on, one-handed usage of the device will most likely be an issue. The screen is also beautifully curved, almost akin to the Samsung Galaxy Edge. The glass itself is Corning Gorilla Glass 4, and has survived a few days in my pocket with my keys.


On the right hand side of the device are three silver buttons that aren't overly-tactile, but stick out from the body of the phone just enough to be felt without too much probing. These are the volume buttons and a quick-mute button.

The left side of the phone features the lock-button.

The top of the phone features the SIM card and MicroSD [yes! That's right! Expandable storage!] slots, which both require the use of a SIM tool to be opened. The phone also utilises a nano-SIM, so those of you [like me] using the dinosaur that is a full-sized SIM will need to have a pair of scissors handy. A noise-cancelling microphone also lives here.

The bottom of the phone includes the 3.5mm headphone jack and a place to connect a Micro-USB cable, either for charging or for USB-MHL purposes. The BlackBerry Priv does support quick-charging, but a suitable cable for this is not provided with the device.


The back of the device contains the 18 megapixel Schneider-Kreuznach camera and dual LED flash. On first use [and before updating the camera app], the camera seemed absolutely painfully slow. In a world where most phones are happy to capture a snap in a fraction of a second, the Priv's apparent reluctance to take a quick photo does grate on the nerves a tad, but has improved since the update!

The speaker grille is on the front of the device - no stereo sound here, folks! Above this is a small metallic ridge. Push this up, and hey presto! You now have a phone with a physical keyboard.


Hang on... this all feels very... familiar...

For some, this may be a veyr strong reminder of BlackBerry's last foray into creating a device with a slide out keyboard: the BlackBerry Torch 9800.
As a former owner of the Torch, I surely hope that the Priv lives a longer and slightly better life. After just a few days, the Torch developed strange rattles, squeaks and general idiosyncracies, and in just over a year it died a very quick death. Here's to hoping that the Priv, which is clearly priced and created to be a 'premium' device, is much more reliable.


Running The Device In...

In recent years, BlackBerry have been a major partner of the Mercedes AMG Petronas F1 team, and much like a Formula One car, the Priv requires a bit of 'running in', and doesn't function completely perfectly out of the box. In the first few days [especially while you're setting everything up and making it the device you need it to be], battery life leaves a lot to be desired, and with the heat that the device emits, it also functions as a neat handwarmer, as the 64-bit, hexa-core, Snapdragon 808 processor fires up and finds its feet.

However, after the first couple of days ended, battery life looks like it's on the way up, and the phone only heats up with excessive screen-on time, or intensive use.


So, after a week with the phone, things look initially positive. Stay tuned to see my full review, when I've used the BlackBerry Priv as my daily driver for a few weeks!
In the mean time, the BlackBerry appears keen to prove that it can put the "smart" into smartphone:

I have had some doubts about the #BlackBerry #Priv, but credit where credit's due: It's definitely intelligent...! #smartphones #android #calculator #maths #maffs #slowclapA photo posted by @amruth92 on

Wednesday 4 November 2015


Those who have read some of my previous work know that I've not always been a huge admirer of Apple. While their products have always been incredibly beautifully designed, I've always found them to be quite restrictive.

Last year, however, my Asus Transformer TF101 gave up the ghost, and I was rendered tablet-less for weeks on end. Oh, the horror! In the spirit of the holiday season (it was about December), I decided to bury the hatchet and buy the iPad Air, the first tablet in the world to have a 64-bit chip, allowing for faster processing speeds.

I'll admit it here and now: I immediately fell in love with my iDevice. Sure, iOS is a little more constrictive, but the apps are beautiful, the iPad itself is light, and it functions without a hitch. The only problem I had was that there was no keyboard. Armed with a leather multi-angled stand / cover, I was able to type pretty quick and coherent messages, but always missed the tactile experience of a proper keyboard.

Enter the Clamcase Pro - a BlueTooth keyboard case, designed specifically for the iPad Air. With its Macbook-esque looks, chiclet keyboard, and a hinge that's as flexible as an Olympic gymnast, it looked like the perfect choice for someone who was quickly and deeply falling in love with the iDevice aesthetic.

First Impressions

It's obvious, from the get go, that the Clamcase Pro was designed to fit the iPad Air like a glove. Not only are there cut outs for the rear camera and clicky buttons for the volume rocker, but there are also tiny little holes that match the speaker grill on the iPad precisely and perfectly. 

In fact, the Clamcase looks so embedded in the Apple 'ecosystem', that the hole for the headphone jack doesn't accommodate headphone cables that are bigger than those on Apple's own earphones! This has been met with consternation by several buyers, several of whom [including me] have ended up resorting to DIY tactics to ensure other headphones will fit.

There is one 'switch' on the device itself, and it's a tiny, sliding button that turns the keyboard on or off. 


The device is easy to pair, and the end-to-end process takes under 10 seconds, and the keyboard is lightening fast. It automatically shuts off after a extended periods of non-use, and will wake automatically if keys are pressed. The keyboard also turns off if the hinge is bent back at an angle past that of a typical 'laptop' angle, so it can be used as a media stand.

Looks beautiful? Check.
Functional? Check.
Practical? Check.

But how does it fare against the sands of time?

One Year On...

They say that beauty doesn't last forever. That statement holds especially true for the Clamcase, unfortunately, despite it being just over a year old.

Some of its imperfections were planned and caused by necessity. As a result of the headphone jack issue, my Clamcase's headphone jack has been crudely widened - but squint a bit, or look at it from afar, and you won't tell that it's a hasty, home rectification.

However, other parts of the device have sprouted very strange cracks - both on the 'inside' and 'outside' of the case. Whilst the case remains structurally intact when the hinge is bent at 90 degrees or less, bending it further means that the case opens up, and the iPad springs free. The interior aluminium-esque trim of the keyboard is coming off of the base of the keyboard, despite the case not being dropped or manhandled in any way. 

The cracks appeared superficial at first, but then began to appear right through the case, and required hasty and rather ugly mending with epoxy putty [which, again, doesn't appear too bad if you squint] and duct tape [which looks horrendous even if you close your eyes].


Thankfully, however, despite the strange signs of battering and bruising that the Clamcase exhibits, it still functions almost perfectly. The keyboard is a joy to type on, the function keys on the top row are a blessing for quick access to certain features, and the multi-functional hinge is still incredibly versatile [when the case isn't spitting your iPad out as you use it].

So, the bottom line is that, if you're buying this case to appease people who look at you as you use it [and, let's be completely honest here, isn't that half the reason for buying a device and accessories that look so good?], you'll be disappointed [and disappointing them!] after a year. But if you prefer function over fashion, this is a great keyboard, and can inspire and augment productivity on the go.

Tuesday 8 July 2014

The whole world appears to be going smoothie-mad at the moment, and it seems that it's infectious. Working in London, it's impossible to walk 3 metres down the street without passing a sleek and slender individual who happens to be carrying a brightly coloured and almost impossibly fresh concoction of fruit and vegetables that would cause Del Monte to go green with envy.

The Backstory

[You could probably skip this if you have no interest in my life and just want to know how the product fares.]

As someone who often has to start work at 0730am [no, I can't quite fathom how I do it either], breakfast can be a bit of a chore. In days of old, I would have skipped it altogether, and just allowed my stomach to provide what sounded like a loud and intrusive percussion solo until lunch, when I'd finally settle down for something to eat. However, after a few years of "growing up", and with the occasional nag from my mother, I've come to realise that breakfast truly is the most important meal of the day. Over the past months, I've been continuously buying Nature Valley granola bars, and would scoff these, albeit hurriedly, on the way to work.

Sadly, while these bars taste rather nice, I'm sure one of them could potentially soak up the entire Atlantic Ocean if it was left there long enough. Sick to death of breakfast-induced cotton-mouth, and desperately searching for some way to get my 5 a day, one of my colleagues came to the rescue. Long story short, after seeing them whipping up some heavenly and hunger-killing concoctions with the company blender [yes, I do have a blender where I work, and yes, you should be jealous], I've been bitten by the smoothie bug, hence why I've purchased the Russell Hobbs Mix and Go.

What does it do?

The Russell Hobbs Mix and Go truly is one of those "does what it says on the tin" types of products. It allows you to blend smoothies, juices, and even cocktails quickly. The product's USP [which isn't so unique - but we'll get on to that later] is that you blend drinks directly in the bottles you'll drink them out of. This means no faffing about with extra attachments, no more using giant jugs, and it also means (thank the Lord) less washing up! 

In the box, you receive two blending/drinking bottles with two drinking lids, one 'blending' lid [with blades to blend the fruit] and the actual blending unit itself, which plugs into a wall socket and does the actual blending.

In order to make a smoothie [or juice, or cocktail], you just put your ingredients in the bottle, put the 'blending' lid on the bottle, turn it upside down and align it with the arrow on the blending unit, and push down to activate the spinning motor. For a hands-free blending experience, you can twist the bottle clockwise to ensure the motor spins without you pushing down. 

Once you take a look at the unit, it doesn't take an engineering graduate to understand that the little plastic nubs on the outside of the blending lid lock with the grooves on the blending unit to spin the blades inside the bottle. And before you know it, your smoothie's made in front of your eyes.

As soon as you feel your drink is smooth enough, take the bottle off of the blending unit, unscrew the 'blending' lid off the bottle, replace it with the drinking lid, and sip to your heart's content.

So how does it do?

This blender is quite a specialist machine... and that's a polite way of saying that it's a one trick pony. This machine is purely for liquid, and is about as useful as a chocolate ashtray for blending mostly solid items. This means that most of your smoothies will have to be quite watery, and finding the right liquid-to-solid ratio is incredibly infuriating over the first few uses.

Since this is mostly a trial-and-error process, expect to be screwing and unscrewing the 'blending' lid several times while you make your smoothie - be careful, though. Sometimes it can become cross threaded and attempt to unscrew itself when you next blend with it, spraying copious amounts of bright, fruity liquid absolutely everywhere. [Fun fact, I once got a smoothie splash on my forehead and managed to go the entire day without noticing. Wait, I probably shouldn't have told you that...].

Be afraid... be BERRY afraid... of your
frozen stuff sticking to the bottle!
At the same time, frozen ingredients [such as frozen berries - which take the hassle out of getting an ice cold yet healthy drink] tend to stick to the sides of the bottle quite well, so a long spoon to prod these free always comes in handy if you're in a pinch and don't want a tonne of solids at the bottom of your bottle. On that note, it's worth mentioning that your smoothies will never truly be 100% solid free - I've found that seeds in berries tend to survive the blending process, and you'll probably want to carry a personal supply of toothpicks if these become your fruits of choice.

Despite the scientific trials and tribulations in what state you'd like your smoothie to finally become, the portability of the bottles means that you will forgive any shortcomings during the blending process. Other than the blades in the 'blending' lid, there's nothing to wash up until you've finished your beverage, which is definitely music to my ears. But a word of warning: when you do go to clean the bottle, you'll need to invest in a bottle brush, as unless you're the child of a Borrower and a Hobbit, you'll struggle to get your hand into the long, narrow bottle. The crevices in the 'drinking' lid can become a bit annoying when it comes to tiny pieces of fruit residue, so a scourer might come in handy, too.

The lid itself is leak proof, and hasn't let me down over the past month - no awkward moments on the tube where I have bright pink liquid seeping out of my bag... which is... handy.


"Ravi, I made a pact never to buy a Russell Hobbs product ever again, but I like the sound of this product."

Fear not. The Breville Blend-Active does pretty much exactly the same thing in exactly the same way. However, some online reviews have stated that the blending unit can develop some issues in some cases - so be vigilant!

Summary

All in all, the Russell Hobbs Mix & Go is a nifty little product for those who are already smoothie-fanatics, or those who want to start getting their fruit in a more convenient way. While it's a bit of a one-trick-pony, it does what it does reasonably well, with the occasional hiccup.

Rating: 7/10

Thursday 5 June 2014


For a few years, I've been highly critical of the programming that's available on TV. It appears that every channel appears to be completely full of poorly-written and shoddily-acted crap that people would only want to watch if they had scraped the bottom of the barrel in terms of boredom or procrastination. Given that I'm now in a new job with unpredictable hours, I'm hardly home to watch shows that I would actually want to see.

In order to get over these problems, most people have taken to buying smart TVs. These have shot down in price tremendously since first bursting onto the scene and are often ram-packed with apps to grant people access to Netflix, BBC iPlayer, and other on-demand services. Our Samsung TV, however, appears to be the most reliable item that my family has ever owned, and so we're not in the market for a shiny, bright, and exciting new television.

So, I've decided to solve these problems in my own inimitable style. Readers of my blog will know that I'm a big fan of gadgets from China [with purchases including the Xiaomi Mi2 smartphone, and a recent Ohsen 'dual-display' watch], and it appears that the new hit devices to head this way are Android TV boxes, which, essentially, make any TV 'smart', and also allow endless customisation. After months of browsing specs and checking out endless Chinese wholesale stores, I finally settled on the Minix Neo X7.

Why the Neo X7?

The Minix Neo X7 runs Android, the same Google-developed operating system that powers millions of smartphones and tablets around the globe. Having owned other Android devices in the past, I'm familiar with the system and interface, and know what I'd be up against. Android, in my mind, is quite a lot less 'restrictive' than Apple TV, and allows for a bit more tinkering.

What's on the outside?


The box is quite easy on the eye and has an aesthetic similar to Apple TV - though the platypus-tail shaped [and optional] WiFi antenna does turn it into a slight eyesore. 

Ports on the device include an HDMI [duh, how else would anyone connect it to their TVs?], an optical audio out port, three USB ports for connecting hard-drives or pen drives, an ethernet port to connect the device to your network using a network cable [or use the device as a router], a 3.5mm headphone jack, a 3.5mm mic jack, and an SD card slot. Phew! 

What's on the inside?

The Neo X7 sports a quad-core GPU, a quad-core processor, two gigabytes of RAM, 16GB of NAND Flash.

What else do you get in the box?


Packaged with the TV box comes an adaptor to power the device, an HDMI cable to connect the box to your HD TV, and a tiny remote to control the device.

Installation

All in all, installation is pretty simple. All you have to do is plug the HDMI cable into TV box and your TV, plug the adaptor into a power socket and into the socket on the box, turn the box on, and follow the instructions and prompts on your TV.

Stay tuned for my full review, where I'll explore the functions of the device and how well it actually works.

Saturday 22 March 2014

A bit of background...

[If you've read my unboxing post, you can probably skip this bit]

Because I've got a new [actually, it's not so new anymore] job in the city*, I've got to take the tube to work. I've decided that I want to get back into reading, and because most of my commutes look a lot
like this - with people violating your human rights on several counts, whilst also kneeing and elbowing you in body parts that you never knew you had - I thought it would be best to get an e-reader. Until now, I made do with reading "real" books [you know... those things with that stuff in them... what's it called again? YES! That's it! Paper!], and my trusty old Asus Transformer TF101 tablet [which is currently about as slow as an old goat, and about as attractive as one, too].

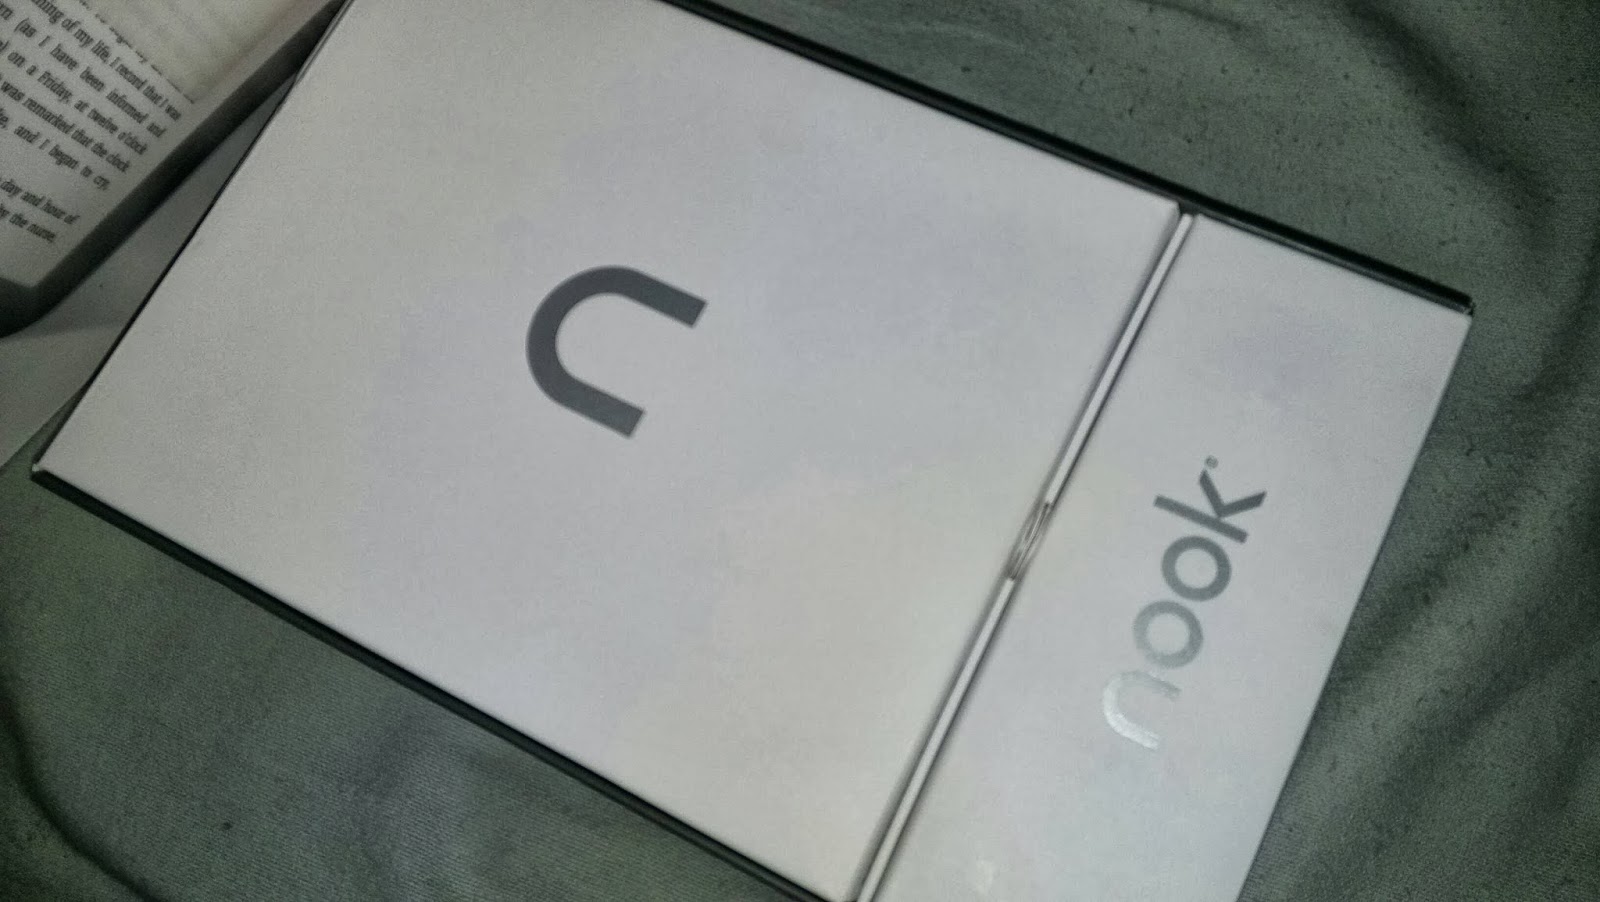
Given that reading with two hands is definitely not an option on the tube [because you don't want to let go of the rail and accidentally touch someone as you fall flat on your face, because you'd then have to verbally apologise to them, and that could cause a whole host of other complications], normal books and my tablet had to go, unfortunately, and have been replaced by this, my new Nook Simple Touch with GlowLight:


I covered most of the specs and start-up process of the device in my unboxing post, so I'll just go straight ahead and dive right into the review.

The review

The Outside

In terms of aesthetics, the nook is quite pleasing. Its rounded corners and rubberised, 'soft-touch' finish make it a pleasure to hold. The device is quite sleek and can be slipped neatly into a bag or backpack, and the four 'clipholes' [for want of a better word] around the device mean that it can be customised with a whole host of covers and accessories. These are accessories that you may wish to invest in - while the unit does feel solid and doesn't feel like it'd need too much protection, the back of it is a finger-print magnet, and requires a lot of wiping down.

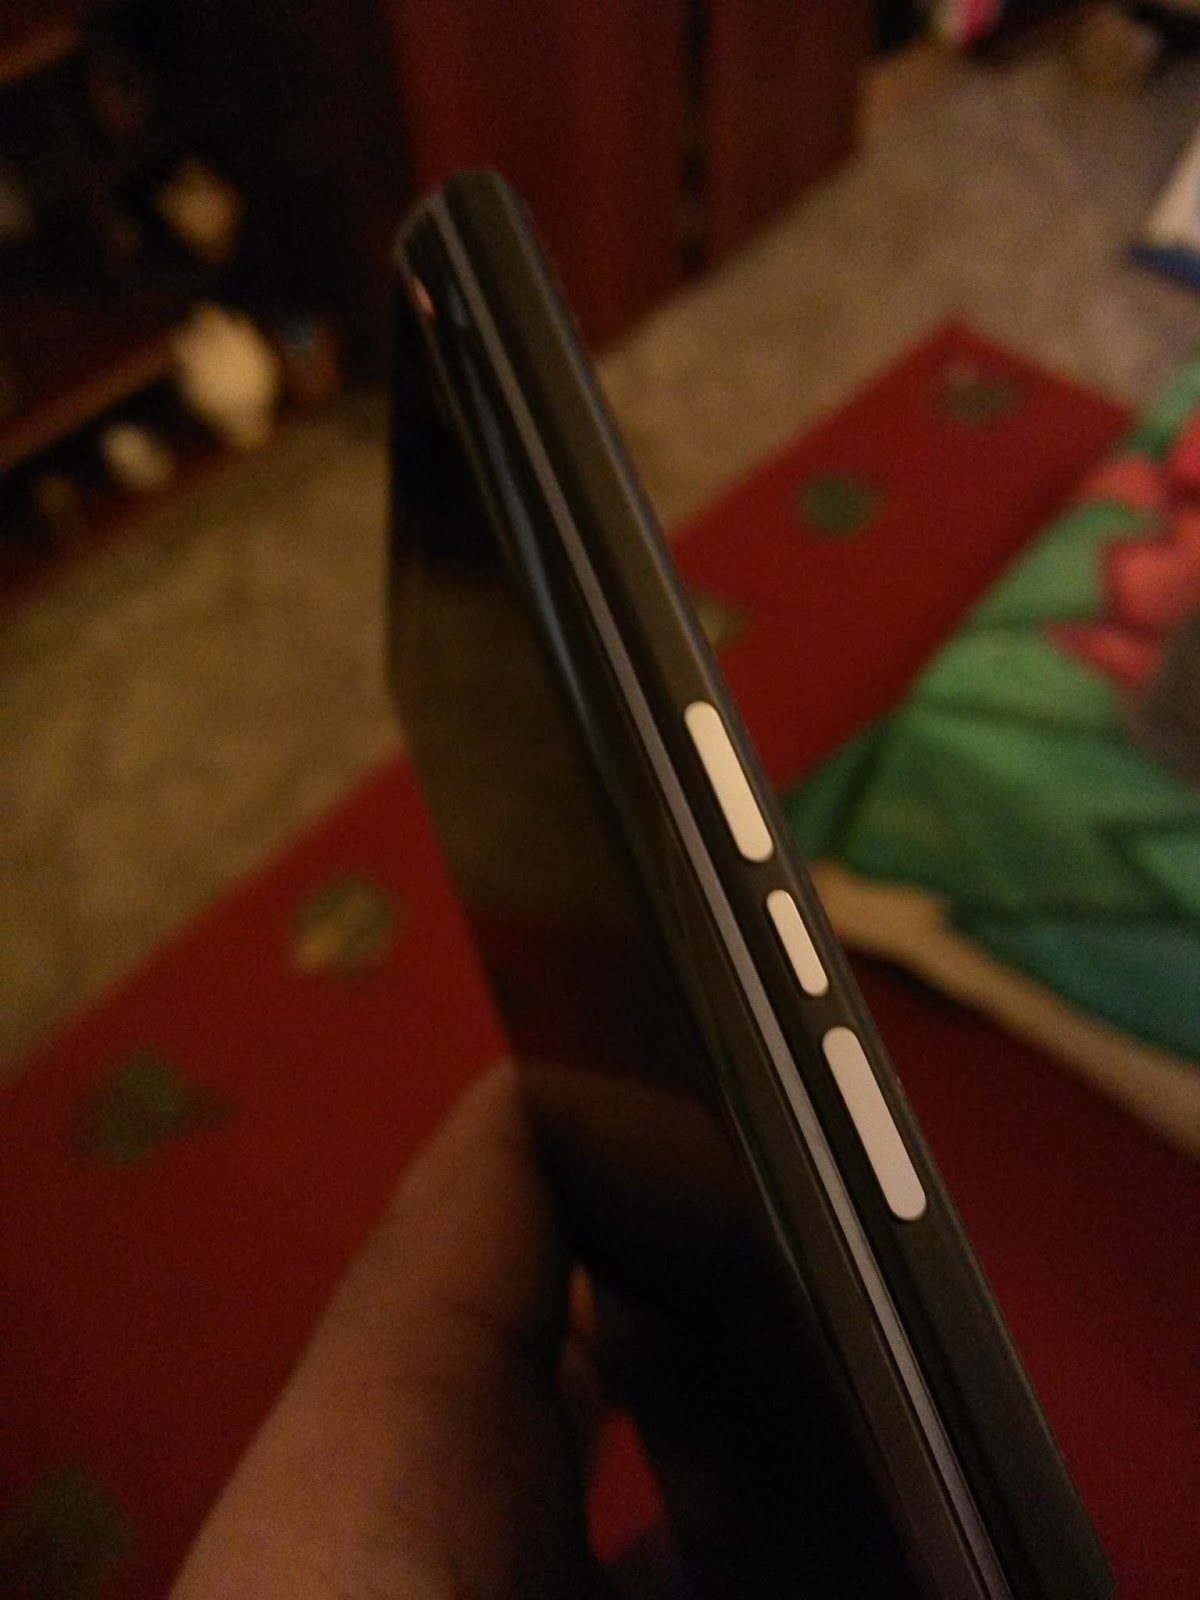
The power button on the back of the unit, whilst being quite firm to start with, does loosen up after a while - but sadly, this means that it develops quite a bad rattle, which could potentially be quite annoying if you plan on travelling with the Nook Simple Touch a lot. The multi-functional 'n' button on the front works well [no rattles here], as do the page turn buttons, which function well on both sides, but take a little time to get used to. Other than these buttons, the device is quite minimalist - no funky d-pads or QWERTY keyboards that can be seen on other readers - just 6 buttons, a touch screen, and a micro USB port.

Having travelled with the device to work for around a month, I've sadly come to the conclusion that I must be the only person in the city of London to own any variant of the Nook Simple Touch. Anywhere you go, you realised that you've just backed the underdog in the e-reader world. Every single book-reading Londoner appears to own a variant of the Amazon Kindle. Don't let this put you off, though - throughout my time with the Nook, I've not had a single pang of jealousy for those who are Kindled up to the nines, no siree.

What does it do?

Well, it allows you to read.

That's it?

Yes, that's it. Unlike other e-readers on the market [namely, ironically, the un-named ones from China], this e-reader does not come with the full shebang, the full monty, or all the bells and whistles. There is no 3.5mm headphone jack for you to play music and listen to your books being read back to you. There is no secret button for you to enjoy a game of pac-man. There is no stock web-browser. 

This device is just an e-reader. I, personally, am more than happy with that. I've got an iPod and a Xiaomi Mi2 mobile phone, so I don't need yet another device that does absolutely everything - I'd rather have a device that allows me to read books, magazines, and the occasional PDF file, and be able to read well.

How do I get books onto it?

There are two ways. Firstly, and arguably the easiest, is to just hook up the Nook to your PC with the provided micro-USB cable and drag and drop books [in ePub or PDF format] to the 'books' folder. Simples. 

Secondly, if you sign up for a Nook account [which you'll be asked to do when you first boot up the device], you can browse the Nook bookstore, either on your PC or the Simple Touch itself, and choose any book you'd like to read and have it delivered to your device over your WiFi connection. Pretty snazzy, huh?

ePub books work incredibly well on the device, though the way it handles PDF files leaves a lot to be desired, with pages rendering slower than a narcoleptic snail. If you tend to use PDFs more than ePubs, I would recommend using a tablet or netbook device.

Battery life

Having never owned an e-reader before, I'm not really sure how to feel about the battery life on the device I've used. People have remarked that e-readers have incredibly long battery lives, and given that they only use power when refreshing the screen, using/searching for WiFi, or having the GlowLight on, one charge is meant to last over two months.

Sadly, in my personal experience, I've not seen evidence of this gargantuan battery life. One charge, for me, would last around a week and a half with the WiFi off, the GlowLight only being used for about an hour in total, and reading for about 2 and a half hours each day. 

Thankfully, though, I've found that if you give the Nook an extended period of rest [and by that I'm admitting that I got tired of reading for a while and I didn't touch the device for two whole weeks], it automatically powers down. This is quite pleasant - until you boot it up again and realise that it's deleted all of the bookmarks and saved passages that you had in your books, meaning that you might as well start reading your current novel from the beginning because you can't remember exactly where you were. 


The screen

The 6 inch screen on the Nook Simple Touch is a pleasure to read off. One of the reasons I decided to say goodbye to my tablet as an e-reader was that I couldn't handle the eyestrain of reading books on its backlit LED screen for hours and hours on end. The Nook's e-ink screen is easy on the eyes, and the adjustable GlowLight is fantastic for reading at night.

While text is crisp and clear to start with, this gets tarnished somewhat by 'ghosting' that occurs when you turn the page. The Nook, by default, is set so it only refreshes the entire screen after you turn six pages, meaning that you avoid the black-and-white flash of a full-page refresh occurring every page whilst also saving battery power. This means that in some cases, words from previous pages are left behind on the screen faintly - this doesn't cause much of a distraction, and can always be reduced by adjusting the number of pages between a full-page refresh.

The device has a touch screen [hence the name Simple Touch]. This makes use of a bunch of infrared beams being shot across the surface of the screen to pinpoint where your finger actually is. While the screen is incredibly responsive - typing on the keyboard screens that come up is actually a joy on this device - it can sometimes be a bit too sensitive - brush up against the device with a different part of your body as you hold it and you'll end up being accidentally moved 200 pages further in your book.

As I mentioned briefly in the unboxing post, the screen itself feels a bit like the textured paper in a book, in a weird way. If you decide to move pages on the device by swiping left and right instead of using the buttons, you can almost trick yourself into believing that you're reading a proper book.

The big change that differentiates the Nook Simple Touch from the Nook Simple Touch With GlowLight is the fact that the user can power on a strip of LEDs on the device that will spread light across the screen. While this is a great feature for those who enjoy reading at night or in dark environments, the execution could be improved somewhat - tilt the device away from you, and you can clearly see the strip of LEDs and the green tinge of the circuit board they're attached to. This hasn't been much of an annoyance to me, but if you're one to nit-pick, the Amazon Kindle may be a better device for you as "all the small things" have been executed to a slightly higher standard.


The system

The operating system that the Nook Simple Touch runs is... [wait for it]... Android. Even though, out of the box, it has limited functionality when compared to smartphones and tablets running the same type of OS, it can be rooted and modded to your satisfaction - so if just reading isn't enough for you, you can tinker to your heart's content. [I use the device as an e-reader only and have not done this, though you can find tutorials online. Of course, do this at your own risk!]

The stock system and software on the Simple Touch is responsive and functions surprisingly well for something running on an e-ink screen. Customisation features allow you to change the font, font size, line spacing, and margins within any particular book, which ensures that this device could be perfect for both young 'uns and more mature people in your life. 

By hooking the device up to a PC and dragging a few images over to the ___ folder, you can change the screensaver images that appear whenever you hit the lock button on the device. If you upload more than one image, these will cycle through in order. 

To sum up


All in all, the Nook Simple Touch with GlowLight is a nifty little device. Stylish, light, and compact, it's the perfect device for reading books on the move. However, with prices in the UK starting at around £30, it may be a bit pricey for a device that, essentially, is a bit of a one-trick-pony. That being said, if you're a hardcore reader, I wholeheartedly recommend this device. It's simple to use, portable, and tech-lovers can have fun rooting and modding away.

Pros:
- Customisation options mean that the device can be used by anyone
- The device is small and light, perfect for reading on the move.
- The GlowLight is a handy addition and is great for reading at night without glare or eyestrain.
- The touchscreen is a joy to use and the system is incredibly responsive.

Cons:
- Books lose all bookmarks and reset to the first page when the battery dies or goes to 'sleep' after an extended period of non-use [though this may just be a problem with my particular device!]
- PDFs are about as useful as a chocolate ashtray on the Simple Touch
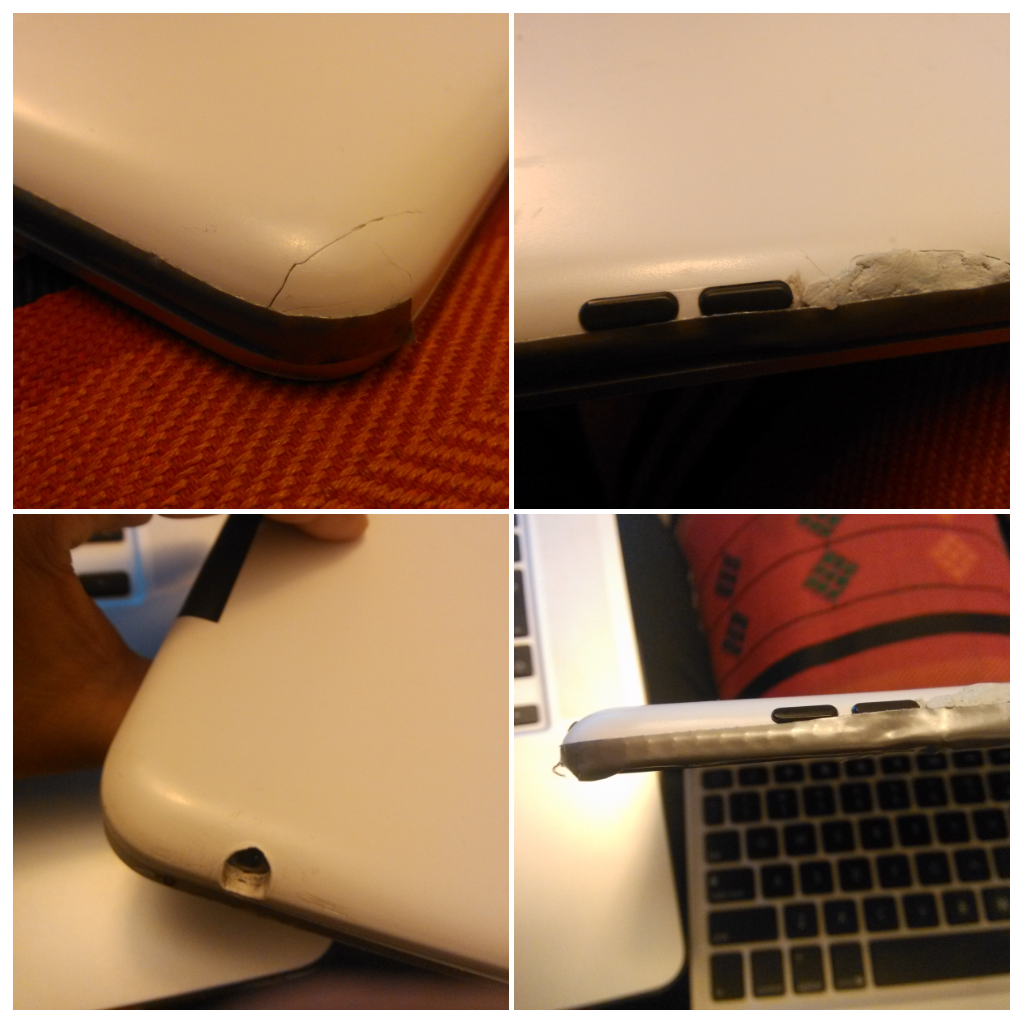
- Build quality could be improved, but I didn't find this to be too much of an issue. If you are concerned about your device, a whole host of covers and accessories are available.


Thursday 15 August 2013

Recently, I've taken up a new job in the city of London. As I live in the outskirts of London [so far north west, in fact, that they forgot to give my town a north-west postcode], this means that every day involves a 40-60 minute commute on the tube. As a result of the official rules of the Underground, whereby I can't look anyone in the eye, say anything out loud, or make any discernible or communicative facial expression whatsoever, this means that my brain pretty much switches off for around an hour every day - not so useful when you're in a job that expects you [to at least attempt] to be 'on it' from the word go.

Up until now, I've been reading books on my tablet, a three year old Asus Transformer TF101. Admittedly, it's been fantastic - it handles PDF files [such as magazines and journal articles] perfectly, and hasn't been too shabby at letting me read ePub books, either, having been my reader of choice for books such as One Day, and The Mechanic's Tale. Sadly, the tablet's starting to get a bit slow, and it's not exactly perfect for reading with on a tube packed with morning or evening commuters - turning the 'page' requires two hands [so you can't turn the page and hold onto the train at the same time if you're standing] or one hand and a nose [but I don't want to look that insane], and the tablet's a bit heavy to continuously hold for 30-40 minutes non-stop.  At the same time, reading for long periods of time can be a bit of an eyesore with a tablet.

As a result, I've now decided to become one of "them". That's right, I'm now one of those seasoned, hard-core commuters who know exactly where their oyster cards are at every moment of the day, know exactly which carriage to be on to get off as quickly as possible at their departure station, and carry an e-reader. My e-reader of choice is the Barnes and Noble Simple Touch, given that I was able to purchase one on eBay for around £40. I opted for a model with the GlowLight, so I could read in the dark without spending even more money on clip-on lights and other accessories.

Unboxing

The Nook Simple Touch is packaged stylishly in a two-part box, which slides out of a branded cardboard piece, fully loaded with information about the device, and reviews of the device - much like real books. 

The box contains the actual e-reader in one section, and the micro-USB cable, charging brick, and other gubbins in the bottom section. The device itself was packed up well in soft, foamy material, but the charging pieces were only protected with cardboard.

Getting started was pretty easy, and was achieved by pressing the power button on the back of the unit for a couple of seconds.


The front of the device features a 6 inch touch screen [that actually feels a bit like textured paper when you rub your finger over it], with an almost rubberized bezel that allows you to grip the unit well. The Simple Touch with GlowLight has a silver trim, making it look slightly different from the 'bog standard' [yes, that is a technical term] Simple Touch, which has a black trim. There are 'page turn' buttons on both sides of the screen - this means that it's easy to operate the device with just one hand, but these buttons are a little bit fiddly. The 'n' logo on the front pretty much does what you'd expect it to - wake the device up, enter menus, activate the glowlight, etc.

The bottom of the device features a Micro-USB port, allowing you to charge the device and connect it to your computer.

The back of the device has a power button that also doubles as a lock and 'wake' button, and an imprinted Nook logo.

Start-up and Setup

The setup of the device is quick and easy. Being a simple e-reader, it's not the most customisable set-up there is - but you wouldn't expect it to be. When you first boot up the device, you can select the language you'd like menus to be presented in, set up the WiFi [which will allow you to access the Barnes and Noble store to download new books - if you don't want to sideload PDFs or ePubs, that is], and test out the GlowLight. 

In general, booting up the device does tend to take a while,  but as e-readers only tend to use battery power when the WiFi is on, reading light is on, or page is refreshing, most people are content with leaving their e-readers with the screensaver on, rather than completely powering down the device.

Conclusions

My first impressions of this device are quite positive - it looks good, and it appears to function well. The GlowLight is incredibly easy to use, and the text looks quite sharp. But will it stand the test of time? Keep an eye out for my full review for details!

Gallery